
Modern computing demands peak efficiency from every component. When your system lags, hardware bottlenecks are often the culprit—not just software issues. Unlike temporary fixes, optimizing physical components delivers lasting results.
This guide covers both maintenance and upgrades. From clearing clutter to installing an SSD, small changes make a big difference. You don’t need expensive solutions to see improvements.
Readers exploring top boost hardware often end up considering innovative assistive technologies transforming as part of the same topic.
Start with simple steps today. Remove unused programs, update drivers, and clean temporary files. These actions free resources immediately. For deeper enhancements, consider RAM upgrades or switching to solid-state drives.
Cost-effective strategies come first. Before seeking professional help, try these proven methods. A faster, more responsive system is within reach.
How to Speed Up Computer Hardware: Essential Strategies
Effective troubleshooting starts with recognizing whether your system struggles with physical constraints or software conflicts. Hardware bottlenecks—like maxed-out RAM or an overworked CPU—cause consistent slowdowns during specific tasks. Software issues, however, often lead to random freezes or app crashes.
Hardware vs. Software Bottlenecks
Windows Task Manager reveals real-time resource usage. If your CPU or disk hits 100% during basic tasks, hardware limits likely exist. Software problems may show erratic spikes instead.
Use Resource Monitor to track patterns. For example:
- RAM limitations: Frequent disk activity (swapping) indicates insufficient memory.
- CPU throttling: Sustained high temperatures reduce processing power.
Identifying Performance Issues
Watch for hardware failure signs like HDD clicking or overheating. Proactive monitoring with SMART tools (e.g., CrystalDiskInfo) predicts storage failures.
Diagnostic Checklist:
- Check Task Manager for abnormal CPU/RAM/disk usage.
- Test with high-demand applications to isolate bottlenecks.
- Clean internal components to prevent thermal throttling.
| Indicator | Hardware Issue | Software Issue |
|---|---|---|
| Slowdown Pattern | Task-specific | Random |
| Resource Usage | Consistent peaks | Spikes |
| Solution | Upgrade components | Reinstall/update apps |
Clean Up Disk Space for Faster Performance
Cluttered storage slows down even powerful systems. Temporary files and cached data accumulate over time, reducing available disk space. Maintaining at least 25GB free on SSDs prevents performance degradation.
Windows Optimization Methods
The built-in Disk Cleanup tool in Windows 11 handles common junk files:
- Right-click any drive > Properties > Disk Cleanup
- Select temporary internet files and system archives
- Use “Clean up system files” for update remnants
For advanced cleanup, open Command Prompt as admin. Run cleanmgr /sageset:65535 to access all options.
macOS Storage Solutions
Apple’s Storage Management provides visual recommendations:
- Go to Apple menu > About This Mac > Storage
- Click “Manage” to review optimization suggestions
- Empty Trash Automatically and Reduce Clutter
Manual files removal targets hidden caches:
- User cache: ~/Library/Caches
- System cache: /Library/Caches
- Time Machine backups: /Backups.backupdb
| Method | Windows | macOS |
|---|---|---|
| Built-in Tool | Disk Cleanup | Storage Management |
| Target Location | %temp% folder | User/Library |
| Third-party Option | CCleaner | CleanMyMac X |
Automate storage maintenance with scheduled cleanups. Set monthly reminders to review download folders and empty recycle bins. Cloud services like OneDrive can archive older files.
Uninstall Unused Programs to Free Up Resources
Unused applications silently drain your system‘s potential. They occupy storage, run background services, and fragment your resources. Regular cleanup maintains peak efficiency.
- Control Panel: Legacy interface showing all installed programs with modification dates
- Settings App: Modern view filtering Microsoft Store apps and Win32 software separately
Residual files account for 15-30% of a typical program’s footprint. Specialized tools like Revo Uninstaller perform deep scans to eliminate:
- Registry entries
- Temporary caches
- Configuration leftovers
Pre-installed OEM software often resists standard removal. Use dedicated manufacturer utilities or these workarounds:
- Safe Mode uninstallation
- Third-party debloat scripts
- Clean OS reinstall (last resort)
| Task | Windows Solution | macOS Solution |
|---|---|---|
| Basic Uninstall | Settings > Apps | Drag to Trash |
| Complete Removal | Revo Uninstaller | AppCleaner |
| Bloatware Handling | PC Decrapifier | CleanMyMac X |
Monitor background services through Task Manager (Windows) or Activity Monitor (macOS). Look for processes from uninstalled programs still consuming resources.
Limit Startup Programs to Reduce Boot Time
Slow boot times often trace back to unnecessary programs launching at startup. These hidden culprits consume resources before you even begin working. Streamlining this process can shave seconds—or minutes—off your wait.

Managing Startup via Task Manager
Windows 11’s Task Manager reveals which apps delay your boot. Right-click the taskbar or press Ctrl+Shift+Esc to open it. The Startup tab shows:
- Impact ratings: Low/Medium/High indicators for each program
- Last BIOS time: Measures firmware initialization duration
- Disabled options: Safe-to-remove entries like updaters
Disabling Unnecessary Services
Background services often launch without user consent. Press Win+R, type msconfig, and navigate to Services. Check “Hide all Microsoft services” to avoid system instability. Common safe-to-disable items include:
- Printer spoolers (if not using physical printers)
- Bluetooth support services (for non-Bluetooth devices)
- Third-party updaters (check manually instead)
For advanced control, Microsoft’s Sysinternals Autoruns maps every startup trigger. It exposes browser extensions, scheduled tasks, and even BIOS-level launches. Cloud storage clients like OneDrive often appear here—consider delaying their sync until after login.
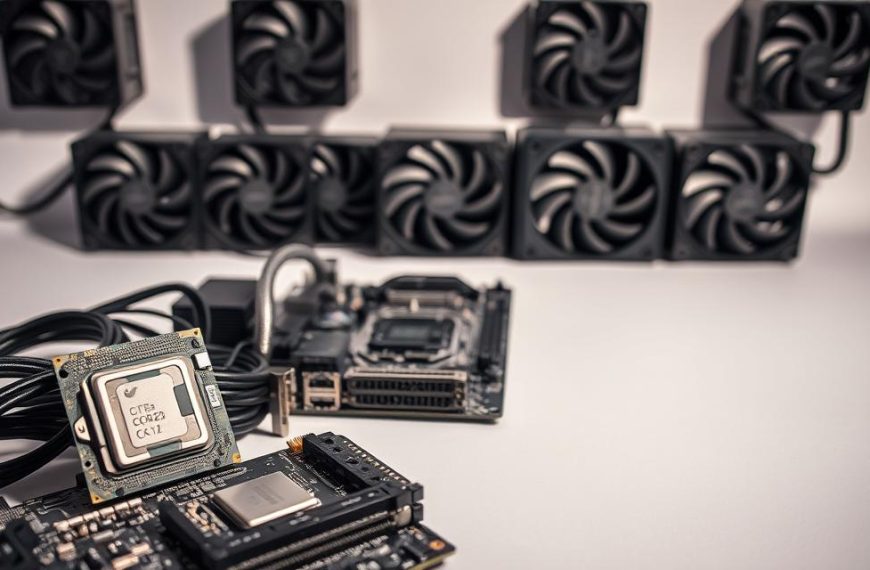
Upgrade Your RAM for Better Multitasking
Multitasking efficiency hinges on available memory resources. When applications compete for limited RAM, slowdowns become inevitable. Upgrading is a cost-effective way to enhance performance without replacing your entire system.
Start by verifying compatibility. Modern motherboards support DDR4 or DDR5 RAM, but not both. Tools like CPU-Z reveal your motherboard’s specifications and current memory configuration. Matching modules ensure optimal dual-channel operation.
For laptops, SODIMM modules are smaller than desktop DIMMs. Always check maximum supported capacity—16GB suits casual users, while 32GB+ benefits creators and gamers. Virtual memory settings should adjust automatically after installation.
Dual-channel setups double bandwidth by using identical paired sticks. Enable XMP profiles in BIOS to unlock advertised speeds. After installation, run MemTest86+ overnight to detect errors.
| Usage | Recommended RAM |
|---|---|
| Basic Tasks | 8GB-16GB |
| Gaming/Streaming | 16GB-32GB |
| Content Creation | 32GB+ |
Handle modules by the edges to avoid static damage. Proper seating is critical—listen for clicks when inserting. If issues persist, reset CMOS or update BIOS firmware.
Run a Malware Scan to Remove Performance Drains
Hidden malware often cripples system responsiveness without obvious symptoms. From crypto-miners to browser hijackers, these threats consume resources silently. Regular scans protect both security and performance.
Microsoft Defender Offline Scan detects rootkits that evade normal scans. Boot from USB to catch deep-hidden threats. For everyday protection, Malwarebytes excels at identifying PUPs (Potentially Unwanted Programs).
Effective scanning strategies include:
- Scheduled deep scans: Set weekly full-system checks during idle periods
- Process Explorer analysis: Spot suspicious activity in real-time
- Browser reset tools: Remove stubborn hijackers completely
Crypto-mining malware shows distinct patterns—unexplained GPU/CPU spikes during inactivity. Enterprise EDR solutions like CrowdStrike offer advanced threat hunting for businesses.
| Threat Type | Detection Tool | Impact |
|---|---|---|
| Rootkits | Defender Offline | High |
| PUPs | Malwarebytes | Medium |
| Browser Hijackers | AdwCleaner | Low-Medium |
Adjust real-time protection settings to balance security and resource use. Quiet modes minimize scans during active work hours. Always verify update timestamps—outdated databases miss new malware variants.
Update Your Operating System and Drivers
Keeping your system current ensures peak performance and enhanced security. Regular updates patch vulnerabilities and optimize device compatibility. Neglecting them risks slowdowns and exposure to threats.
Checking for Windows Updates
Windows simplifies update management through Settings > Windows Update. Enable automatic downloads but configure active hours to avoid disruptions. Critical patches often require reboots—schedule them during downtime.
For air-gapped systems, WSUS Offline Update creates local repositories. Follow these steps:
- Download the latest package from Microsoft’s catalog
- Transfer via USB to the target machine
- Run the installer with administrative privileges
Updating Graphics and Chipset Drivers
Outdated drivers bottleneck hardware potential. NVIDIA offers two branches:
- Game Ready: Optimized for new releases
- Studio Driver: Stable for creative software
Offline systems benefit from Snappy Driver Installer. It scans hardware and updates drivers without internet access. Always verify WHQL certification to avoid instability.
| Driver Type | Update Method | Risk Level |
|---|---|---|
| Graphics | Manufacturer Tool | Low (WHQL) |
| Chipset | Device Manager | Medium |
| Beta | Manual Install | High |
If issues arise, roll back drivers via Device Manager > Properties > Driver tab. Firmware updates require extra caution—always backup data first.
Optimize Your Web Browser for Speed
Browser optimization unlocks hidden performance potential with simple adjustments. Modern web applications demand efficient resource use, and small tweaks can significantly enhance responsiveness.

Chrome Flags and Firefox’s about:config offer experimental features. Enable these cautiously—test one change at a time to isolate benefits.
- Hardware acceleration: Uses GPU for rendering (Chrome: Settings > System)
- Extension audit: Remove or pause memory-heavy add-ons via Chrome Task Manager
- DNS-over-HTTPS: Improves privacy but may slightly delay initial connections
Session restoration trades convenience for resources. Disable “Continue where you left off” if startup sluggishness occurs. Cache size formulas vary—limit to 250MB for SSDs, 1GB for HDDs.
| Setting | Chrome | Firefox |
|---|---|---|
| Memory Saver | Enabled by default | Requires add-ons |
| Experimental Flags | chrome://flags | about:config |
Regularly clear cookies and cached images. Automated tools like CCleaner streamline this, but manual control prevents accidental data loss. Update your browser weekly to patch memory leaks.
Defragment Your Hard Drive (HDD Users)
Fragmented data slows down traditional spinning disks significantly. When files scatter across physical sectors, read/write heads work harder to assemble data. Regular defragmentation reorganizes this chaos into contiguous blocks.
For typical users, defragmenting every two to three months maintains optimal drive performance. Heavy usage scenarios—like video editing or database work—benefit from monthly sessions. Always maintain at least 15% free space for effective reorganization.
Modern Windows systems automate this process by default. To manually initiate:
- Open Defragment and Optimize Drives (search “defrag”)
- Select your disk and click “Analyze”
- Choose “Optimize” if fragmentation exceeds 10%
SSDs require different care—the TRIM command handles garbage collection automatically. Defragmenting solid-state drives wastes write cycles and offers no speed benefit.
Third-party tools offer advanced features for power users:
- MyDefrag: Custom scripting for specialized workflows
- Defraggler: File-level control and quick optimizations
- UltraDefrag: Boot-time defragmentation for locked system files
| Tool | Best For | Cluster Optimization |
|---|---|---|
| Windows Built-in | Basic maintenance | No |
| MyDefrag | Advanced users | Yes |
| UltraDefrag | System files | Partial |
NTFS cluster size affects defrag efficiency. Larger clusters (64KB+) reduce fragmentation but waste space on small files. The default 4KB setting balances performance and storage economy.
Schedule defrags during system idle periods using Task Scheduler. Combine with pagefile optimization by setting a fixed size (1.5x RAM) before reorganization. This prevents the virtual memory file from fragmenting again quickly.
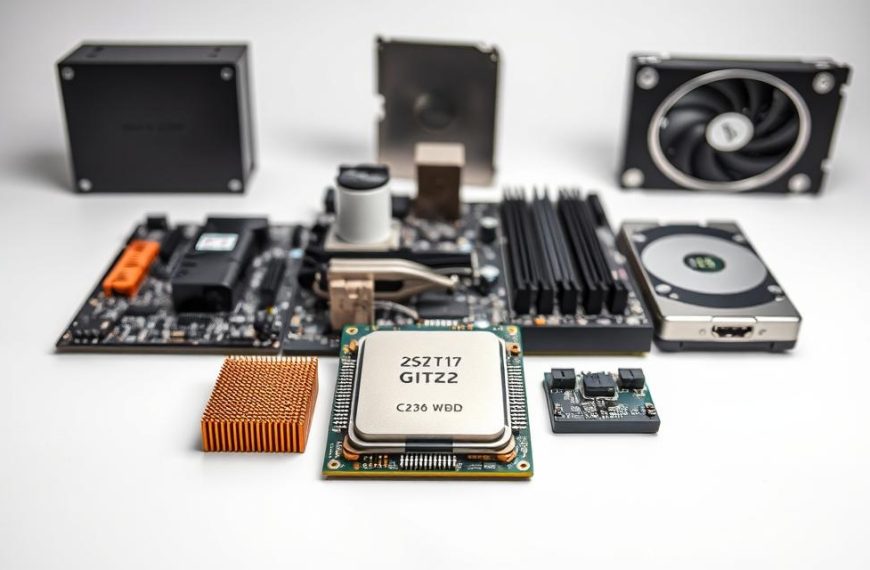
Upgrade to an SSD for Lightning-Fast Performance
Solid-state drives revolutionize system responsiveness with near-instant data access. Unlike mechanical drives, they eliminate seek times—reducing boot sequences from minutes to seconds. This upgrade delivers the most noticeable performance leap for aging systems.

NVMe models outperform SATA variants by 4-6x in sequential transfers. PCIe 4.0 interfaces reach 7,000MB/s, while SATA caps at 550MB/s. For most users, even basic SATA SSDs provide transformative gains over HDDs.
Wear leveling technology distributes write cycles evenly across memory cells. This extends lifespan beyond traditional metrics. Modern controllers also employ:
- SLC caching: Accelerates burst writes using single-level cell buffers
- Over-provisioning: Reserves 7-28% space for maintenance operations
- DRAM buffers: Improves small file performance (check specs before purchase)
Migration tools simplify transitions without reinstalling Windows. Consider these options:
- Macrium Reflect: User-friendly interface with scheduled backups
- Clonezilla: Lightweight for advanced users (requires Linux knowledge)
- Samsung Data Migration: Brand-specific optimization
| Factor | SATA SSD | NVMe SSD |
|---|---|---|
| Max Speed | 550MB/s | 7,000MB/s+ |
| Best For | Budget upgrades | Video editing/gaming |
| Endurance | 150-600TBW | 600-1,200TBW |
Always verify 4K sector alignment after cloning. Misalignment degrades storage efficiency by 10-15%. Tools like AS SSD Benchmark display partition offset values—optimal alignment starts at 1024KB.
Enterprise-grade models advertise endurance ratings (TBW – Terabytes Written). Light users need only 150TBW, while content creators should target 600TBW+. Monitor health via SMART attributes like “Percentage Used” or “Media Wearout Indicator”.
Adjust Visual Effects to Reduce System Load
GUI customization options impact more than just appearance—they affect performance. Modern operating systems prioritize aesthetic appeal, but these visual enhancements consume valuable resources. Striking the right balance maintains usability while freeing processing power.
Windows 11’s transparency effects particularly strain integrated graphics. Disable them via Settings > Personalization > Colors. Toggle off “Transparency effects” to immediately reduce GPU load. This simple change can improve responsiveness on budget systems.
For advanced users, registry tweaks offer deeper optimization. Navigate to:
- HKEY_CURRENT_USERControl PanelDesktop
- Modify “MenuShowDelay” (default 400ms) to 100-200ms
- Adjust “Wallpaper” (set to 0 to disable animated backgrounds)
Animation timing directly affects perceived speed. Reduce window animation duration through:
- System Properties > Advanced > Performance Settings
- Select “Custom” and disable unnecessary effects
- Keep “Smooth-scroll list views” for basic usability
High contrast themes provide unexpected performance benefits. They simplify rendering by eliminating:
- Drop shadows
- Gradient fills
- Transparency calculations
| Effect Type | Resource Impact | Recommended Setting |
|---|---|---|
| Transparency | High (GPU) | Disable |
| Animations | Medium (CPU) | Reduce duration |
| Shadows | Low-Medium | Keep window shadows |
DirectX feature levels influence visual quality tradeoffs. Older hardware benefits from limiting to DX10 or DX11. This reduces shader complexity while maintaining core functionality. Modern Windows systems automatically negotiate optimal levels.
GPU-accelerated GUIs improve responsiveness but increase power consumption. Balance these factors through Graphics Settings > Hardware-accelerated GPU scheduling. Disable this for battery-powered devices, enable it for desktop workstations.
Regular Maintenance Habits for Long-Term Speed
Consistent care keeps your system running smoothly for years. Unlike quick fixes, proper maintenance prevents issues before they slow you down. Small routine actions make a big difference in preserving performance.

Automated Storage Management
Windows Storage Sense handles disk cleanup automatically. Enable it in Settings > System > Storage. Customize these options:
- Run frequency: Daily, weekly, or monthly
- Temp file removal: Delete files unused for 1-30 days
- Downloads folder: Auto-clear older items
PowerShell scripts offer advanced control. Create scheduled tasks to:
- Clear browser caches
- Remove Windows update leftovers
- Compress log files
Proactive Hardware Monitoring
CrystalDiskInfo tracks disk health through SMART data. Watch for these critical attributes:
| Attribute | Healthy Range | Warning Sign |
|---|---|---|
| Reallocated Sectors | 0 | Any nonzero value |
| Temperature | Below 50°C | Consistent 60°C+ |
Prevent thermal throttling with these steps:
- Clean dust from fans monthly
- Replace thermal paste annually
- Use cooling pads for laptops
Event Viewer reveals hidden system errors. Filter these logs regularly:
- Application > Error/Warning
- System > Disk/Driver events
- Windows Logs > Application Hang
UPS battery maintenance protects against data loss. Test backup power every 3 months and replace batteries every 2-3 years.
When to Seek Professional Help
Some system issues demand expertise beyond DIY solutions. Recognizing these scenarios saves time and prevents costly mistakes. Professional technicians bring specialized tools and diagnostic experience.
- PCB damage: Burnt components or corrosion on circuit boards
- Liquid intrusion: Sticky keys or corrosion under microscope inspection
- Consistent crashes during POST (Power-On Self-Test)
“Data recovery labs report 73% success rates for mechanical drive failures when clients avoid DIY attempts first.”
Cost thresholds help decide between repair and replacement:
| Issue Type | Repair Cost | Replacement Cost | Decision Point |
|---|---|---|---|
| Motherboard | $150-$400 | $500+ | 50% device value |
| Data Recovery | $300-$3000 | N/A | Data criticality |
| LCD Replacement | $200-$600 | $800+ | Warranty status |
Enterprise environments benefit from certified support contracts. These services provide:
- Guaranteed response times (often 4-8 hours)
- Advanced replacement for critical components
- Preservation of compliance certifications
Warranty considerations require careful attention. These actions typically void coverage:
- Opening sealed components without authorization
- Using non-OEM replacement parts
- Bypassing manufacturer diagnostics
Professional security services protect sensitive data during repairs. Certified providers follow NIST 800-88 sanitization standards when handling storage devices.
Conclusion
Optimizing your device requires a strategic approach. Start with simple software tweaks before considering hardware changes. Preventive care ensures lasting results.
Balance performance needs with budget constraints. Small adjustments like cleaning storage or managing startup items yield quick wins. For deeper improvements, explore hardware upgrades when necessary.
Future-proof your system by monitoring component health. Regular checkups prevent sudden slowdowns. Prioritize critical updates and security patches.
Follow this final checklist:
- Clear temporary files weekly
- Review startup programs monthly
- Check for driver updates quarterly
- Assess hardware needs annually
Consistent attention keeps your machine running smoothly. Both new and older systems benefit from these practices.
FAQ
What’s the difference between hardware and software bottlenecks?
Hardware bottlenecks occur when physical components like RAM, CPU, or storage limit performance. Software bottlenecks stem from inefficient programs, background processes, or malware.
How do I check which programs slow down my startup?
Open Task Manager (Ctrl+Shift+Esc), go to the Startup tab, and disable unnecessary apps. High “Startup impact” labels indicate resource-heavy programs.
Can upgrading RAM improve gaming performance?
Yes. Modern games require at least 8GB–16GB RAM. Upgrading reduces lag and improves multitasking while gaming.
Is defragmenting necessary for SSDs?
No. SSDs use flash memory, so defragmenting wears them out. Use Windows Optimize Drives (for TRIM) instead.
How often should I run malware scans?
Weekly scans with Windows Defender or third-party tools like Malwarebytes prevent performance drains from viruses or spyware.
Will disabling visual effects make my PC faster?
Yes. Navigate to System Properties > Advanced > Performance Settings and select “Adjust for best performance” to reduce GPU/CPU load.
What’s the quickest way to free up disk space?
Use Disk Cleanup (Windows) or Storage Management (macOS) to delete temporary files, system caches, and old downloads.
How do I know if my HDD needs defragmenting?
Open Defragment and Optimize Drives (Windows). If fragmentation is above 10%, run optimization.
Can a browser affect overall system speed?
Yes. Browsers like Chrome consume RAM. Limit extensions, clear cache, or switch to lightweight options like Firefox or Edge.
When should I consider professional help?
If performance issues persist after updates, hardware upgrades, and malware removal, consult a technician for diagnostics.
 By
By